How to edit WordPress menus – Classic Editor
This guide is for the classic WordPress menu system, since the release of the WordPress block editor new menu system has become the standard. If you’re looking to create menus within the block editor, then checkout our guide Unlocking the WordPress Navigation Block: A Comprehensive Guide
With its built-in drag & drop interface, you can edit WordPress menus on your site effortlessly, from within the Appearance → Menus area of the admin dashboard.
There are three main functions while you edit WordPress Menus which are, creating the menu, adding items to it and removing items. We’ll cover all three, as well as highlight some of the more hidden features.
A WordPress menu usually refers to a list of links that point to the key pages of your website. They help give your site structure while also guiding your visitors through their customer journey.
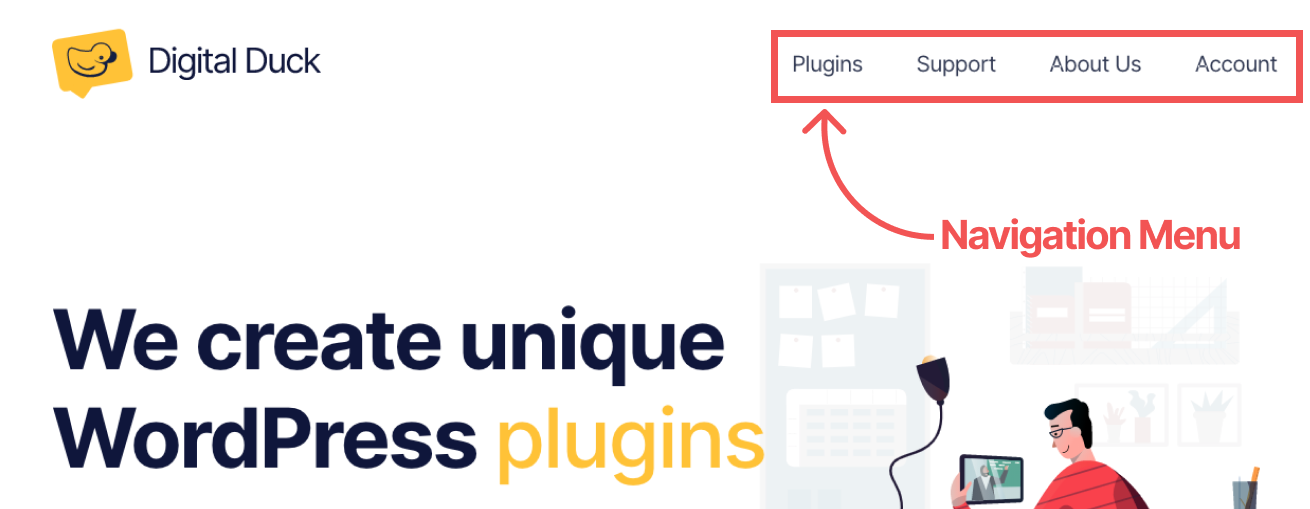
The most commonly recognised example is the horizontal bar of links that you’ll find at the top of many popular websites. However, the position and layout of a menu will be determined by your WordPress theme.
A lot of themes will have multiple options to choose from, which change the look and position of the menu. However, they will most definitely have at least one header menu, footer menu and more times than not mobile, and secondary menu.
How to find the WordPress Menu customiser.
There are two ways to access the menu editing system in WordPress, either through the admin dashboard or, the frontend customiser.
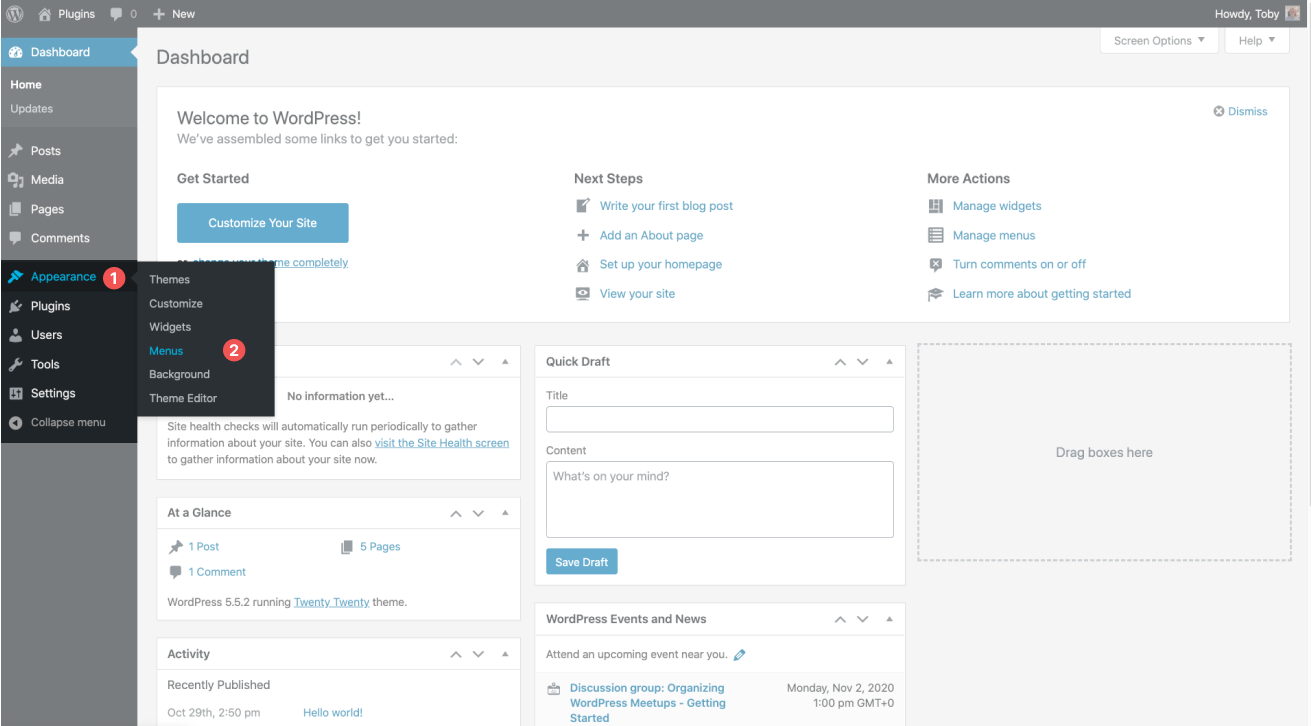
The first method, and the more commonly known, is through the admin dashboard, which can be reached by logging into the WordPress dashboard, hovering your mouse over the “Appearance” item in the left-hand menu and clicking “Menus”.
The second method is through the WordPress customiser, which can be accessed from the frontend of the website while logged into an admin account. Click the “Customise” button followed by “Menus”.
Create your first WordPress Menu.
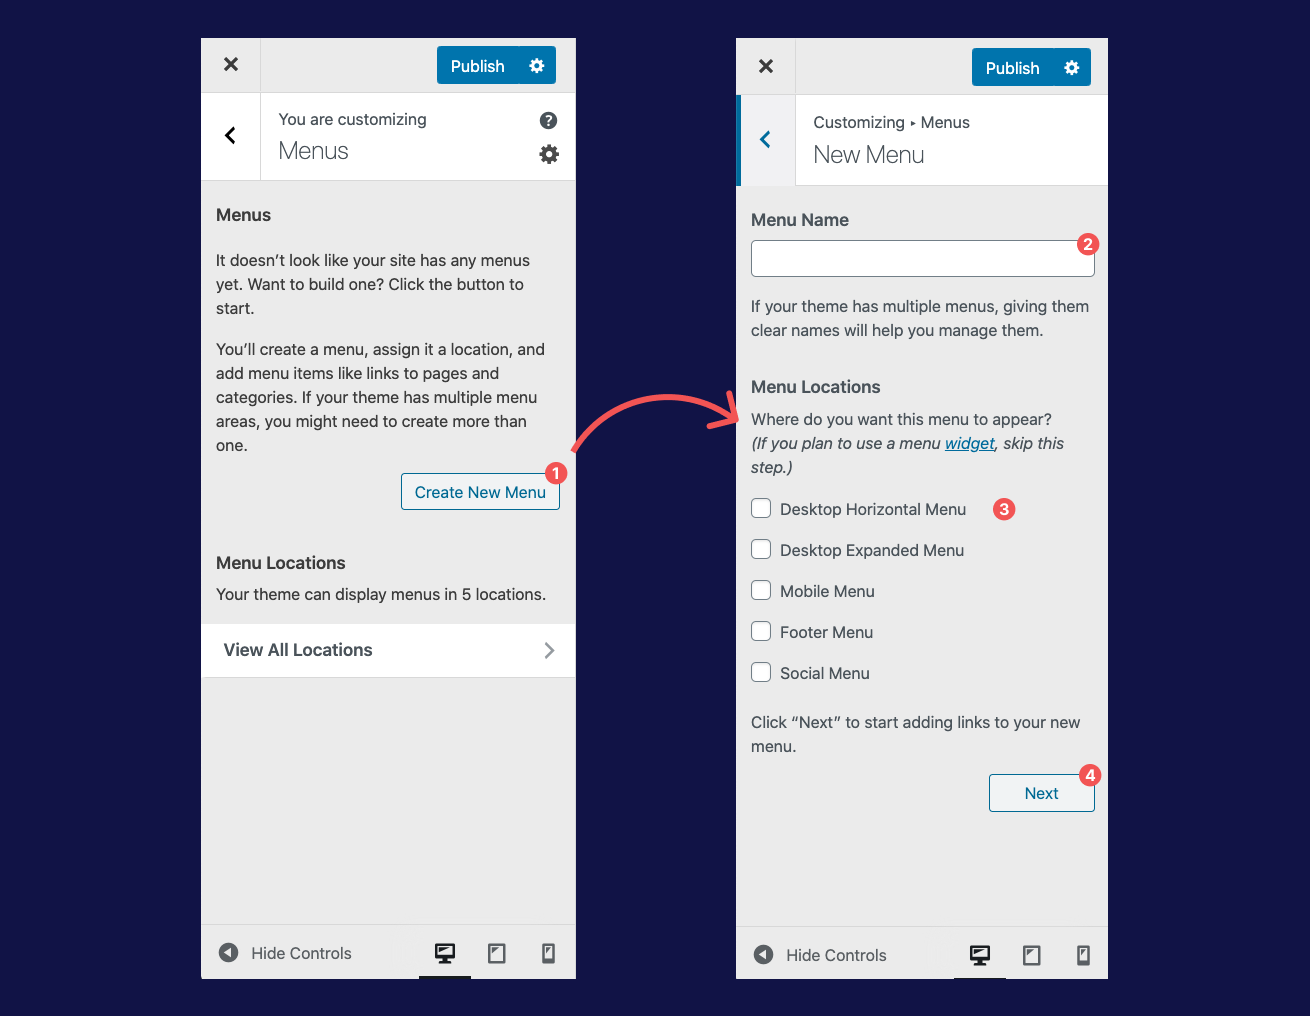
To create a WordPress menu, you will first need to navigate to the WordPress Customiser, Menu settings.
From here click “Create New Menu”, enter the name for your menu like “Header Menu” and finally select the Menu Location that you’d like your menu to appear. Finally, click the “Next” button.
You’ve now created a new menu and will automatically be taken to the “add items screen” to begin adding your menu items to it.
Add items to your WordPress Menu.
If you’ve just finished creating a new menu, then you’re already on the correct page and can skip this next paragraph.
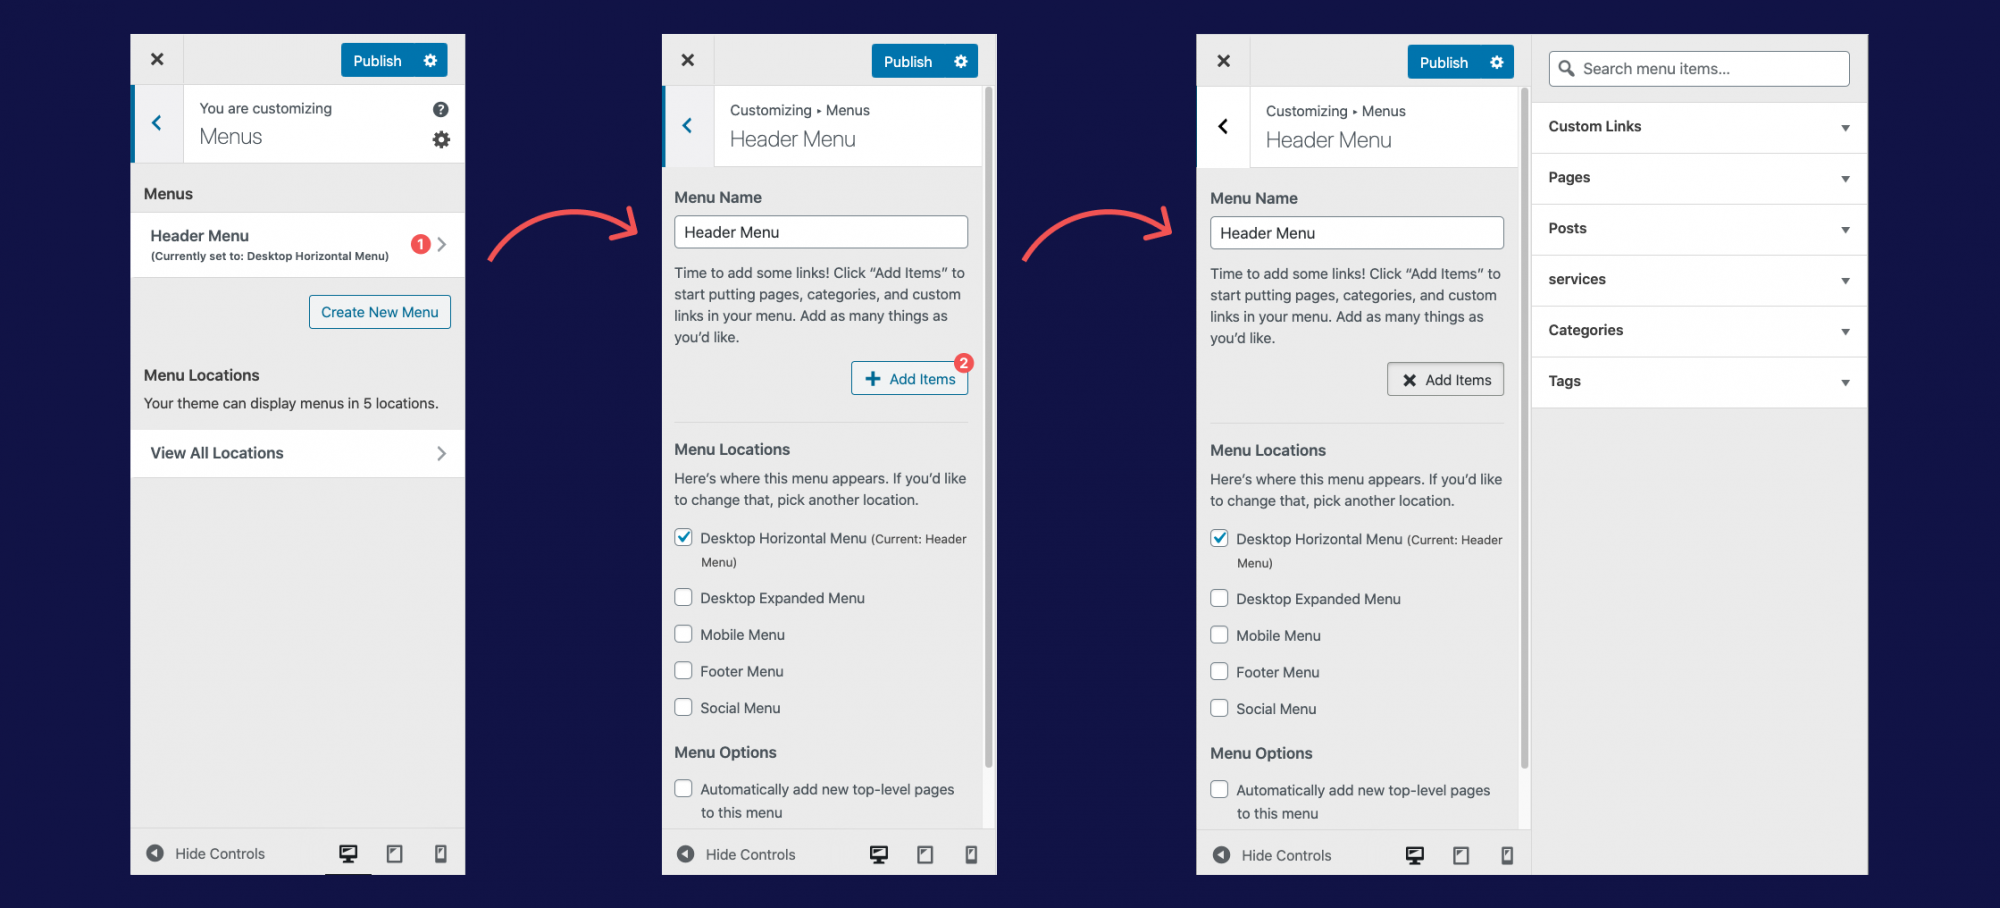
Navigate to the WordPress Menu Customiser, and click the menu you’d like to add items to. If you don’t have any menus, then create a new menu.
Click the “Add Items” button to reveal a subpanel to the right. From this subpanel, you can choose to add new menu items in several ways.
Custom Links
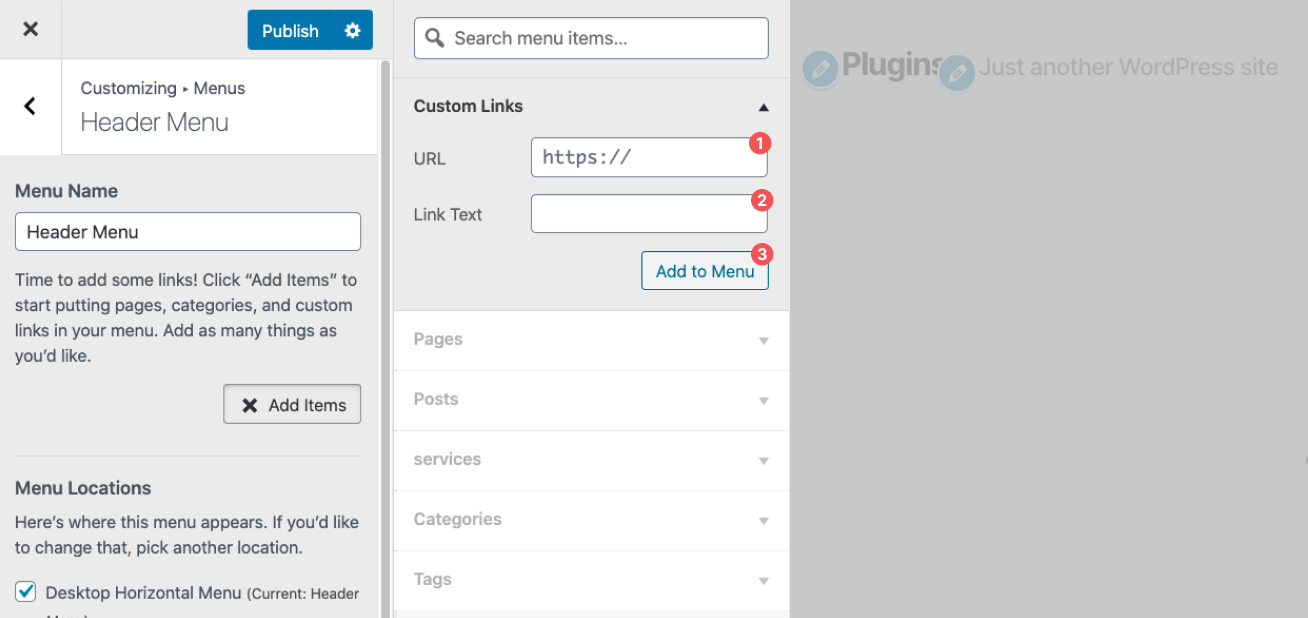
Clicking “Custom Links” will display two fields labelled as “URL”, and “Link Text”.
The “URL” field is where you should enter the full address of the web page, that you’d like your visitor to be directed to when clicked. In the “Link Text” field enter the text that you’d like to be displayed in the menu item.
Once you’ve completed both fields, click “Add to Menu”.
Pages
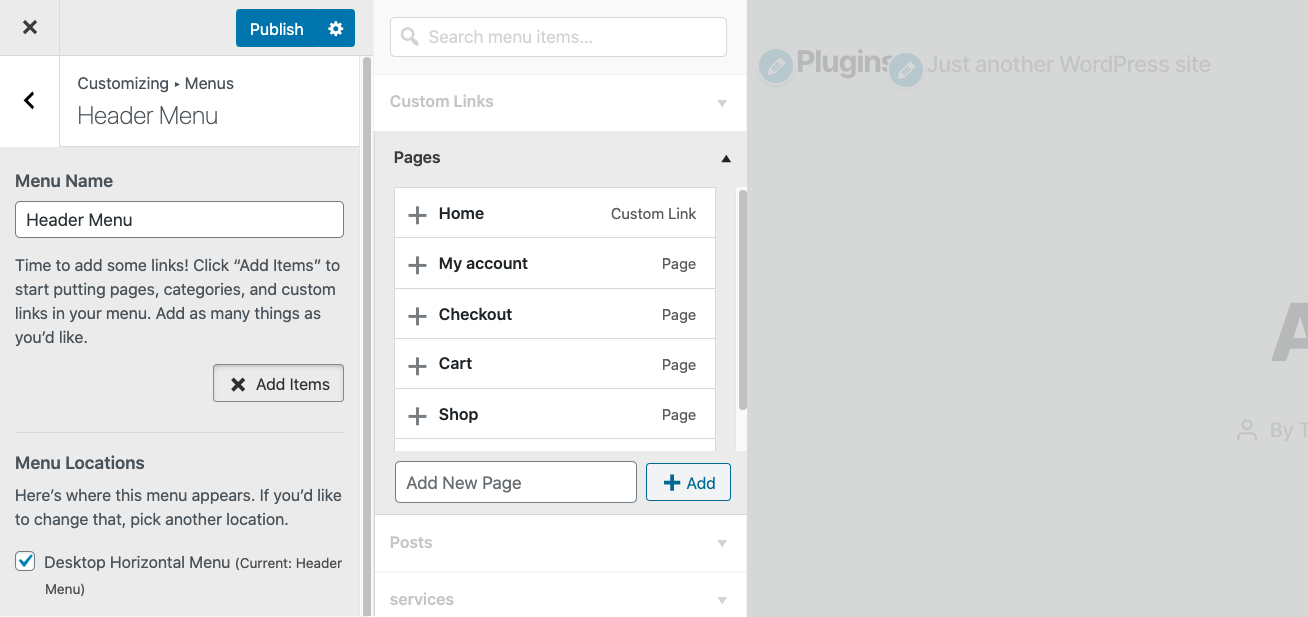
When “Pages” is selected, you will be shown a list of every page currently on your site. Please scroll down the list until you find the page you’d like to add and then click it.
Posts
The “Posts” option is identical to “Pages”, in that it will display a list of every post currently on your website. Clicking the one you’d like to add to the menu is all that’s needed.
Categories & Tags
Like the “Pages” and “Posts” option, the “Categories” and “Tags” choices will list all the associated web pages, clicking the one you’d like to add to the menu will do so.
Custom Post Types & Custom Taxonomies
Many plugins and themes will add what’s called custom post types or custom taxonomies to your website; these are things that work the same as pages or categories but belong to a different subset.
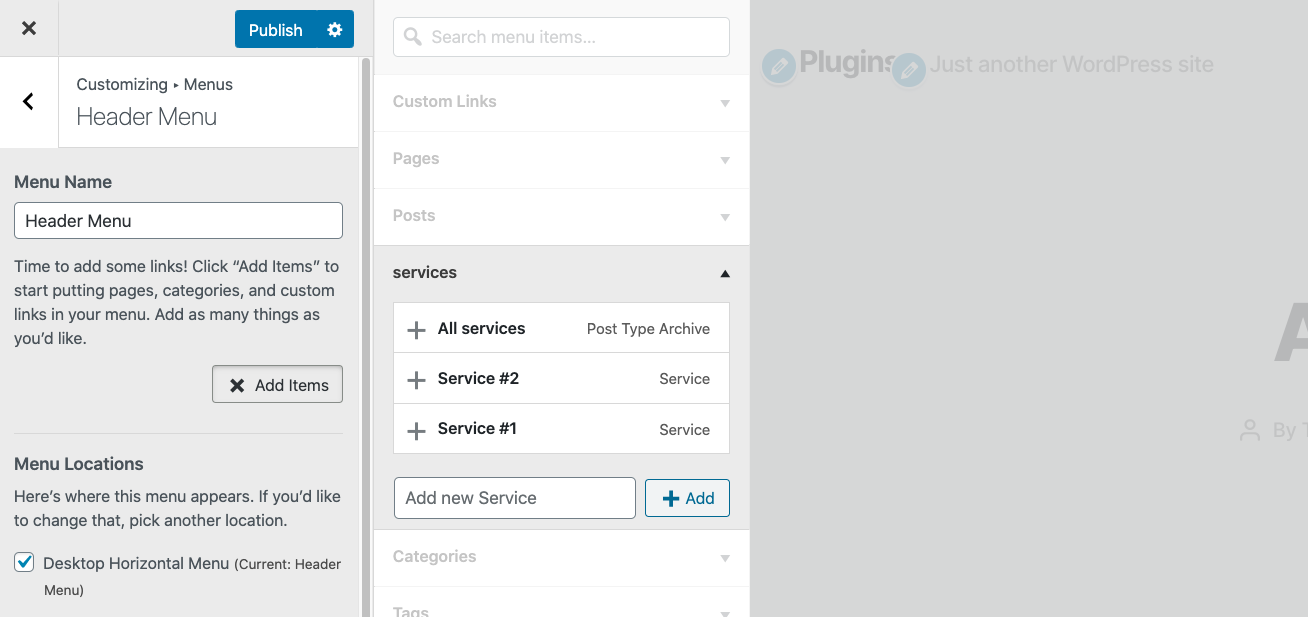
For example, you might have a custom post type for services.
When a new custom post type or taxonomy is created, they will also have a block of options in the menu customiser, and work the same way as the “Pages” options.
There is one minor difference which is, if the custom post type has an archive page (e.g. a page that lists each item) then the menu customiser will also display an option labelled as “All {name of CPT}”.
Once you’ve added all the items to your menu remeber to click the blue “Publish” button in the top right of the menu panel, to save your changes.
Reordering Items in the WordPress Menu
While adding new menu items, you may have noticed that they were all added to the end of the menu, you’re able to reorder them by dragging and dropping each item into the order that you’d like.
The drag and drop system can be a little finicky sometimes, so clicking the reorder button provides up and down arrows for each menu item. Making it a little easier to use.
Once you’ve added all the items to your menu remeber to click the blue “Publish” button in the top right of the menu panel, to save your changes.
Creating WordPress Drop Down Menus
If you’d like to create a multi-tier menu, then that can be accomplished using the drag and drop system, from within the WordPress Menu Customiser.
Drag the item that you’d like to be inside the dropdown, below and slightly to the right of the menu item that you’d like to use as the heading.
Not all themes support dropdown menus, so be sure to check the preview to make sure it’s working.
Additional Menu Item settings
Once added to a menu, the items have additional settings that will affect the way they are displayed and how they act when a visitor clicks them.
The options that come as part of WordPress include:
The Navigation Label option allows you to change the text displayed on the menu item.
Open link in a new tab
The Open link in a new tab option is a checkbox when selected the menu link will open in a new browser tab whenever a website visitor clicks it.
Title Attribute
The Title Attribute option allows you to add a little extra information about the link; this will only be shown to visitors that hover their mouse over the menu item for an extended period of time.
CSS Classes
The CSS Classes option allows you to add additional class names to the menu item; this is usually for developers and allows us to style each item differently, based on the classes entered.
Link Relationship
The Link Relationship option is used to define a relationship with the web address that you’re linking to. Honestly, you’ll likely never need to use this, so here’s the WordPress own documentation for it.
Description
On occasion, you might use a theme that supports the Description option. In which case, you can use this field to add a small body of text to display in the menu. We recently used this option in one of our clients’ websites.
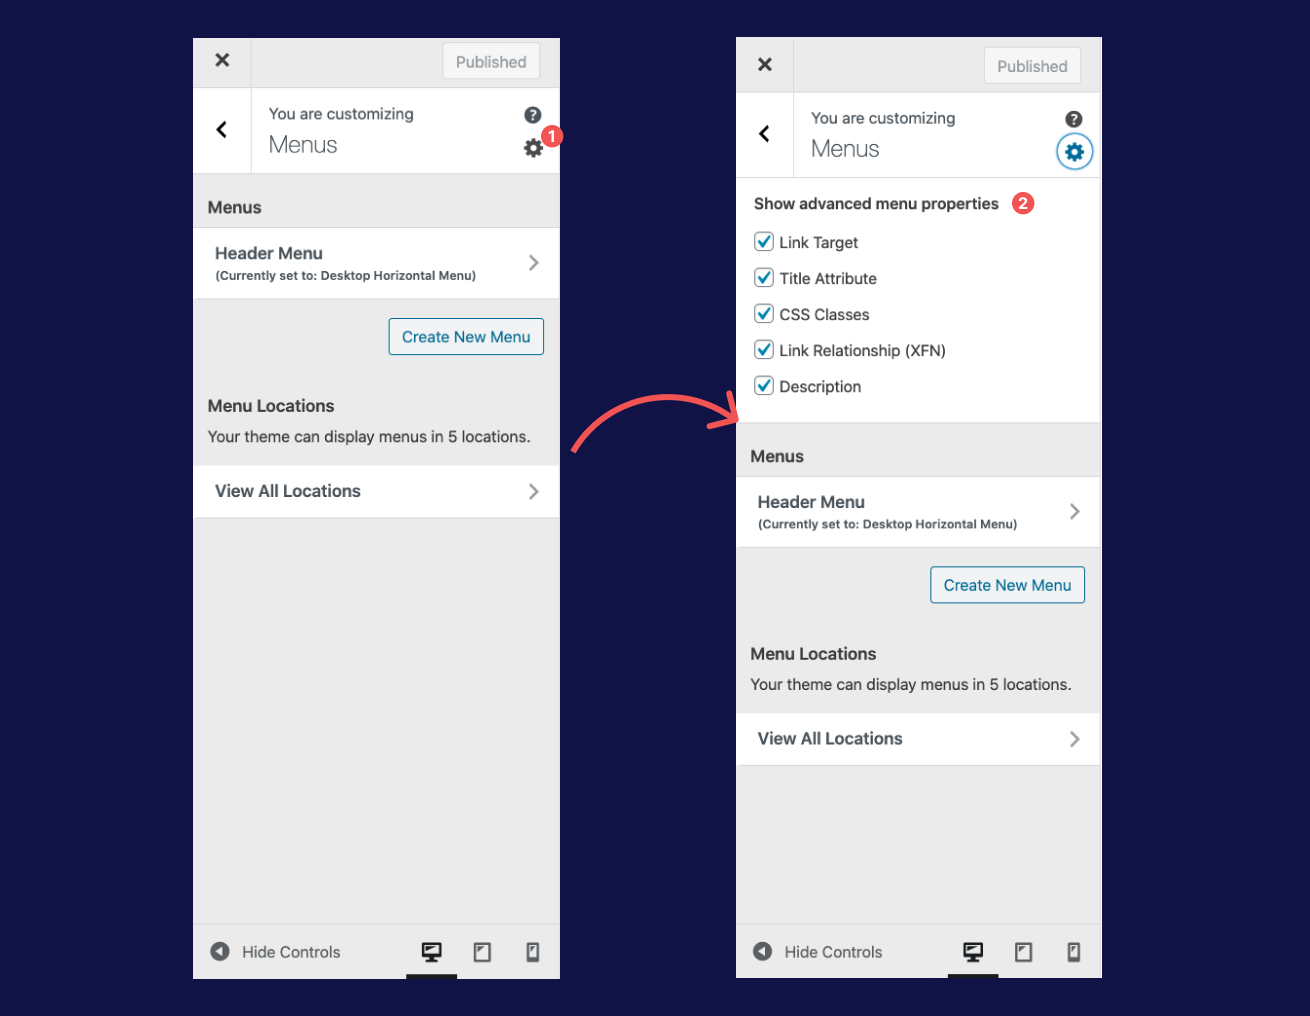
Occasionally, you’ll find that some of the additional menu options mentioned above aren’t shown in the menu options. This is because it’s possible to show/hide them from the menu settings.
To make them display, first go to the WordPress menu customiser and you’ll see a little gear icon in the overview panel. Click this and check the additional options you’d like to be able to use.
To remove an item from the WordPress menu, first, open the WordPress Menu Customiser and select the menu you’d like to edit. Click the item you’d like to remove and scroll down to the “Remove” link. Click the remove link, followed by the blue “Publish” button to finalise the changes.
WordPress offers a multiude of customisation, and makes it effortless to edit a themes menu. The difficulty comes from finding and understanding what each menu option means. We hope that rading this article has given you a better understanding of using the WordPress Customiser panel to create, edit and manage your menus.


