Unlocking the WordPress Navigation Block: A Comprehensive Guide
With the release of the WordPress block editor, there has been an influx of content creation features in the form of “blocks”. Since WordPress 5.9 a new navigation system has become the recommended standard for creating and managing menus. This system is the “Navigation Block”.
The Navigation Block is a powerful tool to personalise your website’s navigation menu by editing its structure and design. This block works with both block themes and themes that offer template editing capabilities, and allows you to create multiple menus anywhere on your site.
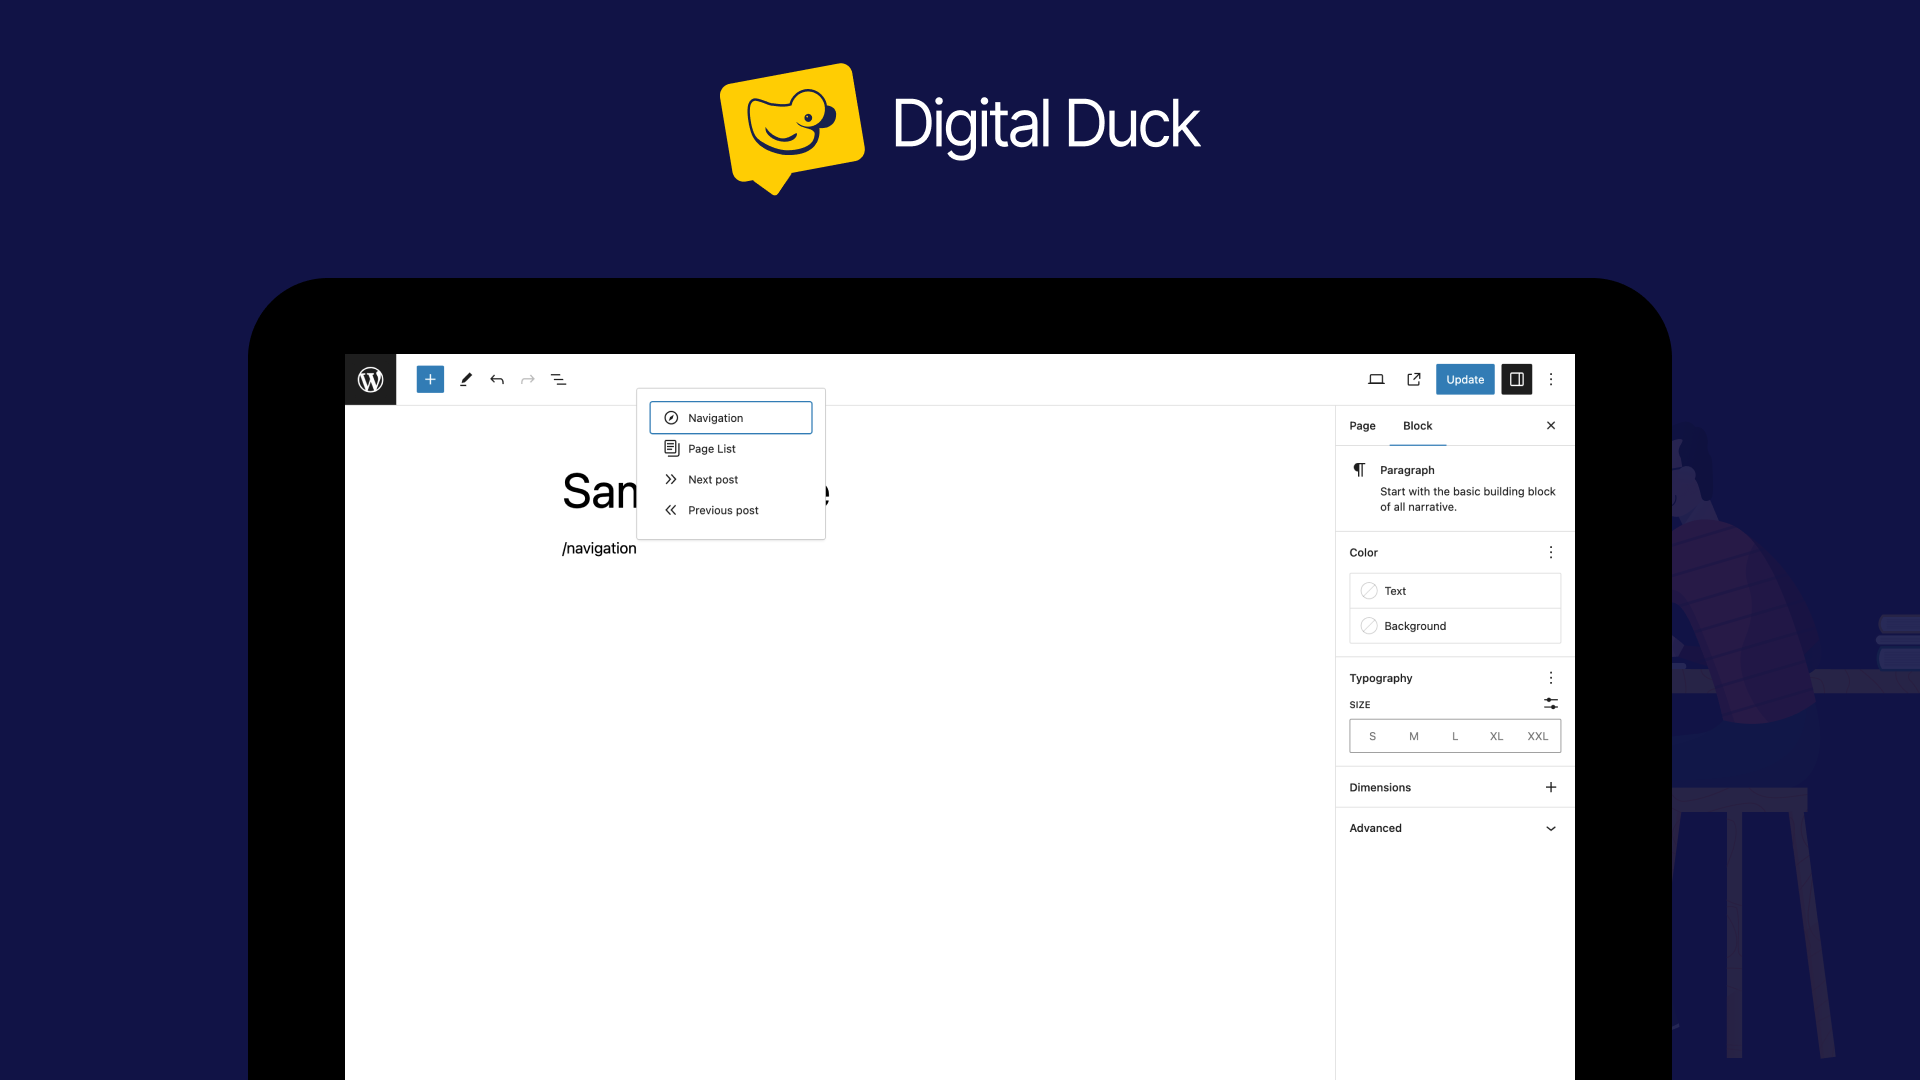
You can add a Navigation block anywhere within the block editor by clicking the “Add Block” button and selecting the Navigation block. Alternatively, you can type “/navigation” and press enter within a new paragraph block to quickly add one.
Once the block has been inserted into the page, you can use the settings panel located on the right of the screen to set the look and feel of the menu. These settings include:
Layout
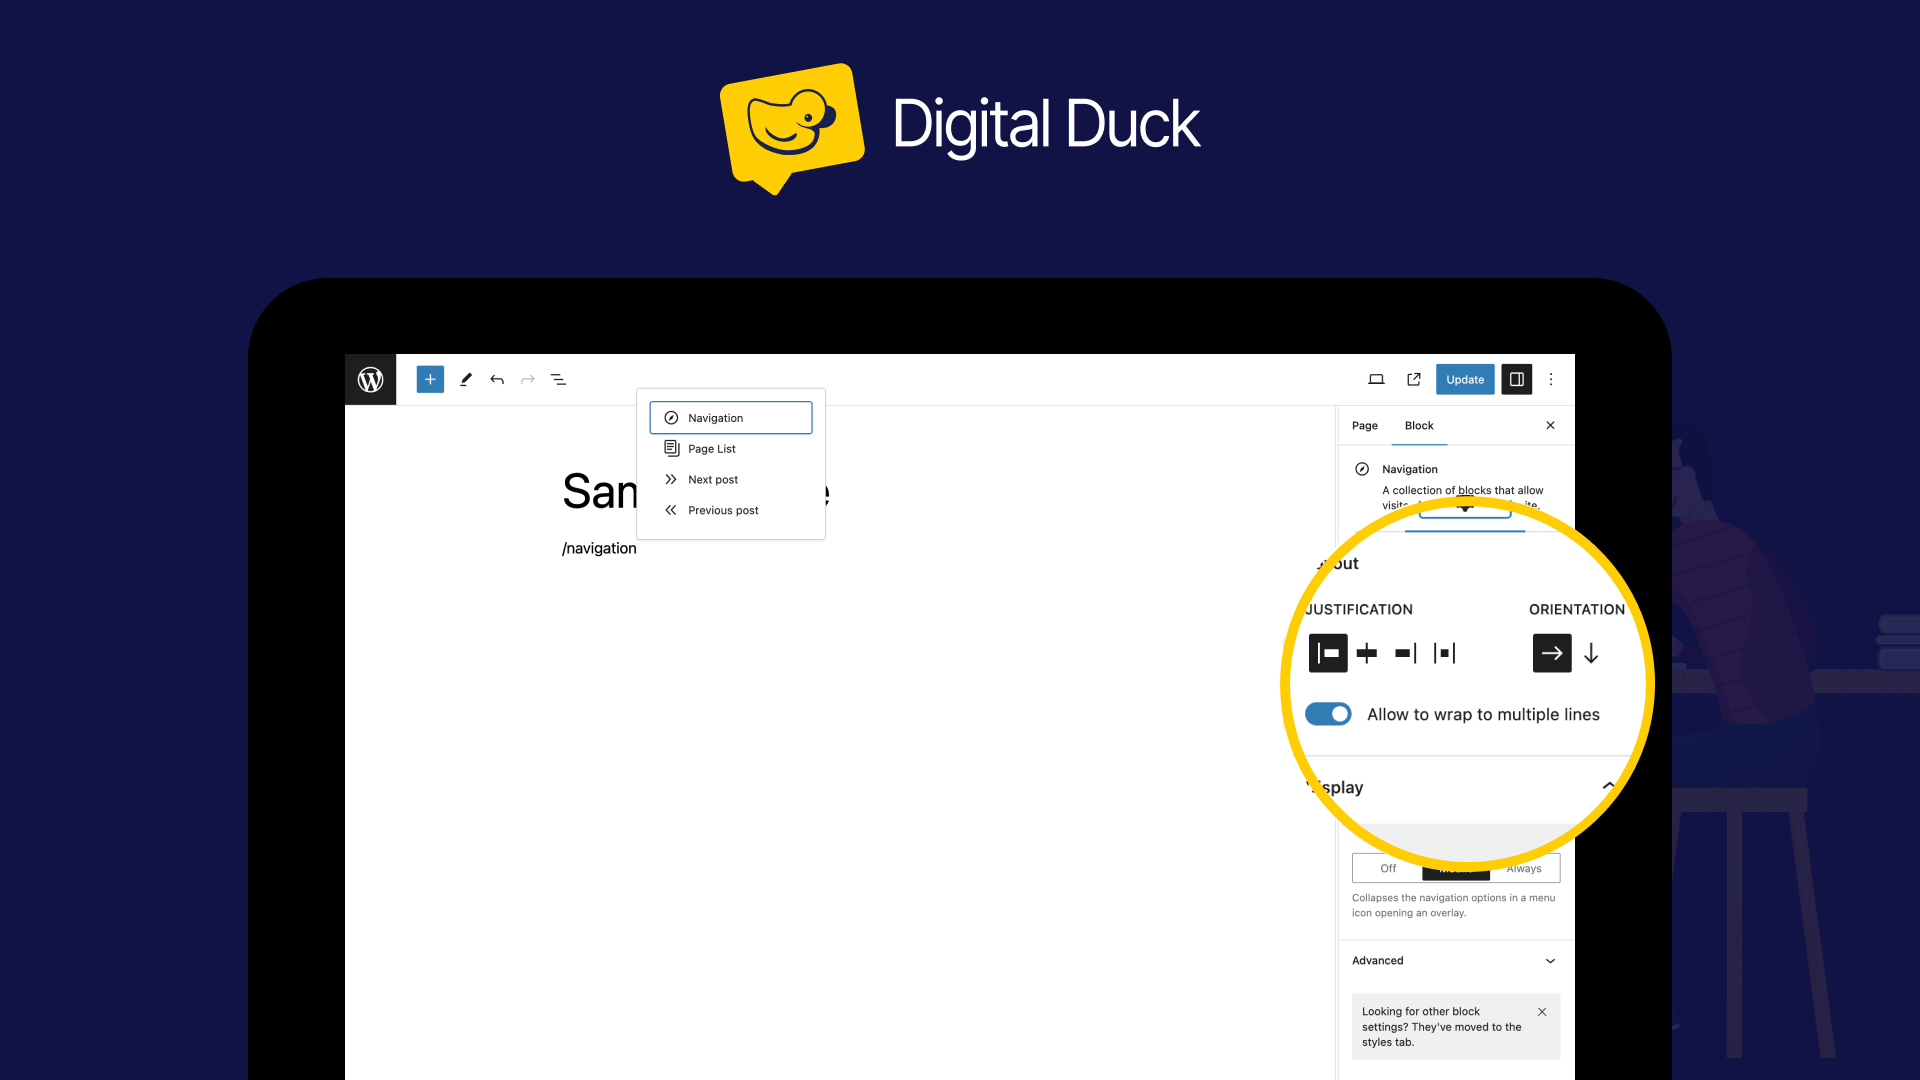
By using layout settings, you can adjust the alignment and direction of the blocks within their parent blocks. Layout controls can be found on the parent blocks themselves.
This means you can change the flow of the block, by setting it to vertical, the menu becomes a list. Setting it to horizontal displays the items side-by-side.
The other layout controls allow you to choose whether items should align left, right or centre. You can also decide whether the link items should drop onto a new line if space becomes too tight.
Menu
In the Menu section, you can choose from existing menus which will appear in the drop-down; or if you’d like, you can create a new menu by picking the “Create a new menu” option from the drop-down.
Below the menu selector drop-down is a “Manage menus” link, which takes you to a screen that lists all the menus saved on your site, and allows you to rename them.
Display
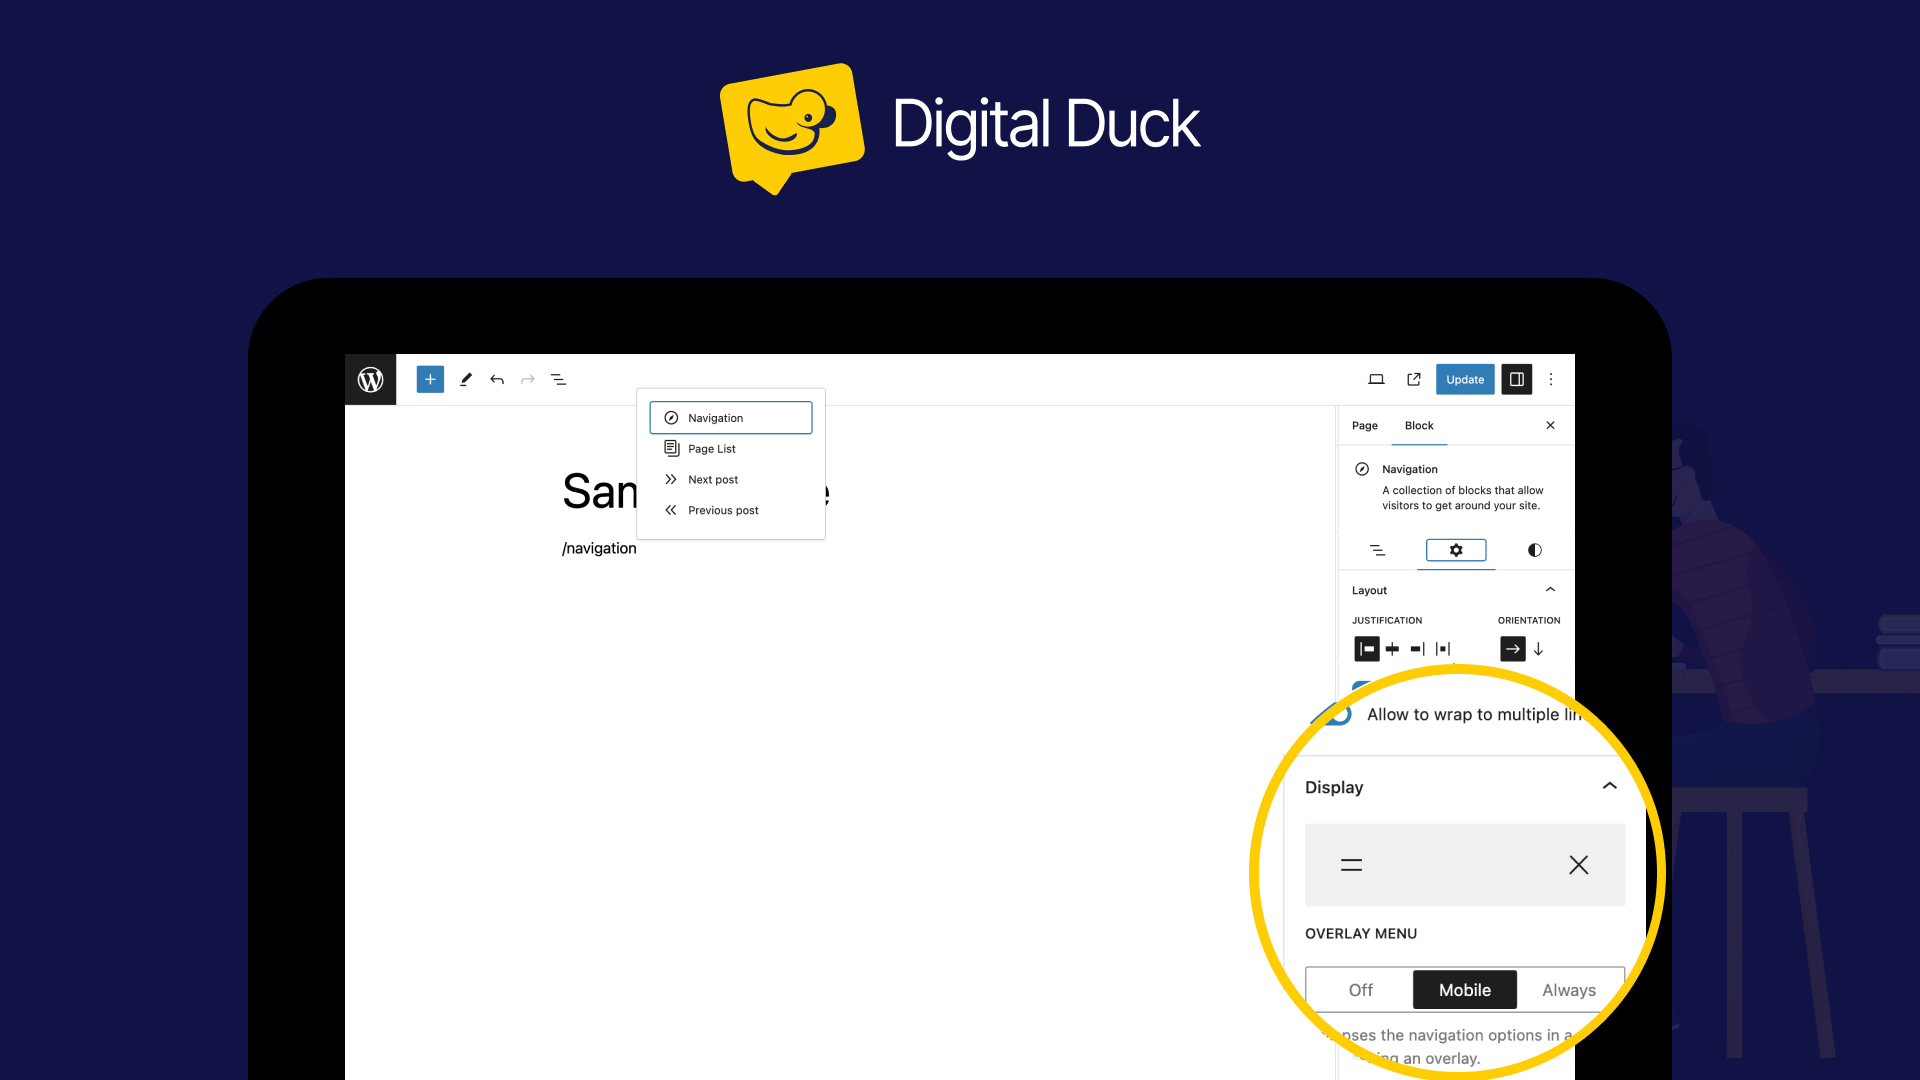
The settings in this Display section enable you to choose what appearance the Navigation block should take depending on the size of the screen. There are three options:
Off: When on a smaller screen, the menu icon will not be visible.
Mobile: When looking at the site on a smaller device, a menu icon can be clicked to view the whole menu as a full-screen overlay.
Always: The menu icon will be displayed no matter the screen size.
By default, this setting is optimised for mobile devices, which means that a menu icon will appear on small screens.
Colours
You have the option of customising the look of your Navigation block by selecting colours from the available suggestions or by entering a custom colours with the colour picker or colour code.
There are four sets of colour options that you can use to personalise your menus:
Text: The text colour of the top level menu items.
Background: The background colour of the navigation block.
Submenu & Overlay Text: The text colour of the submenu/responsive overlay menu items.
Submenu & Overlay Background: The background colour of the submenus/responsive overlay.
If your theme supports it, you can use gradients for the background colours.
Typography
Through the typography settings, you can customise a block’s font size, style, line spacing, capitalisation, and the distance between letters.
Dimensions
The Navigation block offers Block Spacing, a feature that enables you to add a customised amount of space between menu items for a consistent look across the whole block. Basically, it’s the gap between items.
It also gives you the ability to change:
Padding: The space around the inside of navigation block; when set the background colour will be expanded into the padding space.
Margin: The space around the outside of the navigation block; It’s essentially the space between the Navigation block and any other blocks around it.
The Navigation Block also has an inline toolbar that offers you the ability to:
Similarly to the layout settings mentioned earlier the justification settings allow you to change the alignments of the child items.
Justify items left: align the block’s contents to the left.
Justify items center: align the block’s contents to the center.
Justify items right: align the block’s contents to the right.
Space between items: Evenly space the items to the width of the block.
There are several blocks that can be inserted into a navigation menu to provide a useful way for your customers to interact with your site. These “child” blocks include:
Post, Page, Category, Tag, Home, Custom Link Blocks
This group of blocks are exactly what their name suggests and are pretty much the same in terms of functionality. They allow you to insert a link to any of the page types mentioned (Post, Page, Category, Tag, Home, Custom).
Each of the blocks provides a method to search for or enter the URL of the page, as well as the ability to change the text of the link inserted into the menu.
The submenu block inserts a submenu into the navigation block. Within a submenu you can add any of the previously mentioned child blocks.
Site Logo Block
The block lets you add an image into the navigation menu, which then acts as your site logo. This can also be set up to link to the home page of your site.
Bonus tip, when you insert a Site Logo, you can also select the “use as site icon” option to make that image the icon shown in your browsers toolbar.
Other blocks
There’s a number of other blocks that can be used each of which are pretty self-explanitory:
- Search
- Site Title
- Social Icons
Plugins and themes may come with additional child blocks to be added into your menus.
The navigation menu is often the first thing a customer will see on your website, so it’s vital that it’s clean, clear and accessible.
A good navigation menu is essential for any website. When creating a menu I like to follow four key rules:
Your customers don’t need a complete list of every page on your website; more times than not you only need 3-4 items in your primary menu. These few items should then link to overview pages which are used to drill down into more detailed/specific pages.
You can also use submenus, though I would never go more than one level deep. It just becomes confusing at that point.
Use descriptive and logical labels that your customers can recognise and understand. More and more I’m seeing oddly “unique” names for pages. But, remember if no-one knows what a page is about then they’re not going to click it.
Make it responsive
Obviously, there’s no reason in 2023 that the navigation menu isn’t responsive. That being said make sure to test one multiple screen sizes because menus are complicated, and sometimes they just break for no reason. So… Test, Test, Test.
Though the WordPress Navigation block is perfect for creating basic menus, there are a number of limitations that need to be addressed before it becomes robust enough for more designed/bespoke websites.
- Mega Menus are pretty much impossible.
- The interface is a little difficult to use.
- Menu titles don’t auto-update when they’re pages on your own site.


